If you begin a conversation without selecting an agent from the dropdown menu, the default agent, currently GPT-4o, is selected.
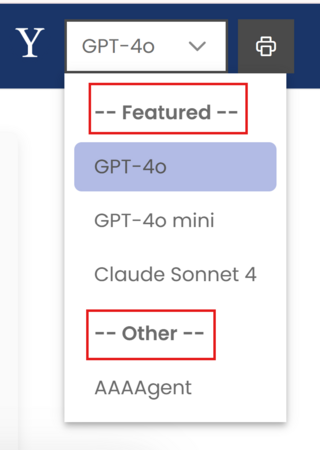
To select an agent in Clarity, use the dropdown menu in the upper right corner of the screen. The dropdown menu is divided into featured agents, which includes the Clarity agents available to all users, and other agents, where you will find any Custom Agents to which you have access.
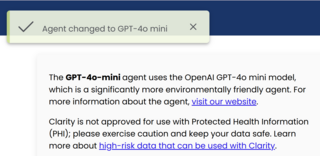
When you select an agent, a pop-up window indicates which agent has been selected and a message with details about the selected agent is displayed.
You can close the pop-up window and begin a conversation with the agent.

You can choose which Clarity agents appear in the agent selection dropdown menu for your account. To control which agents appear, click the “Settings” icon in the bottom left corner of the Clarity screen.

This will open a window where you will be able to choose which agents appear in the agent dropdown menu. By default, Clarity’s six featured agents, each of which uses a different AI model, are enabled.
In the settings window, uncheck the “Enabled” box for any agents you do not want to appear in your agent dropdown menu. Check the “Enabled” box for any agent that you would like to appear in the dropdown menu. If the box next to an agent is grayed out, you cannot disable that agent. The box is grayed out if the agent is the default featured or if the agent is the one currently selected. To disable the selected agent, exit the settings screen, choose a different agent from the dropdown menu, and enter seeings again. Marking the “Show enabled agents only” checkbox will filter the list to show only the agents you have enabled. If that checkbox is not marked, every agent that you have access to use in the Clarity platform will be listed.
Featured agents and Custom Agents will appear in different sections of the dropdown menu, as shown at right.